Showing posts with label recipes. Show all posts

Sunday, December 21, 2014

Love, Laughter, and EVERYTHING in Between: Day 21-Holiday CHEER!

Egg nog is a festive holiday beverage that I've been enjoying my whole life.  Once I became "of age" my "Aunt Annie" from the Bronx taught me how to make it from scratch.  There are multiple ways to enjoy egg nog; here are a few of my favorite recipes, hope your family and friends enjoy these as much as mine does.


Homemade Eggnog
 6 whole eggs and 4 yolks
 1 1/2 cups sugar
 Pinch of salt
 3 cups heavy whipping cream, divided
 2 cups milk
 1 tablespoon vanilla
 1/4 teaspoon cinnamon
 1/4 teaspoon nutmeg
 3 ounces Whiskey

Whisk eggs and yolks, sugar and salt in a 4-quart sauce pan on low heat.
While continuing to stir, add 1 cup of heavy whipping cream. Then add milk slowly.

Stir continually to prevent eggs from curdling. Continue cooking until mixture thickens (about 20 minutes).

Let the custard cool, and add 2 cups of heavy cream followed by vanilla, cinnamon, nutmeg and whiskey.

Yields about 10 servings


Eggnog Bourbon Balls
I've made Bourbon Balls before and they are ALWAYS a hit.  Although the original recipe doesn’t incorporate any actual liquid eggnog, cut the amount of bourbon in half (to 1/8 cup) and substitute 1/8 cup of eggnog instead. ENJOY!

1 cup crushed vanilla wafer cookies (grind in food processor)
1 cup powdered confectioners sugar
1 cup ground pecans
2 tablespoons cocoa powder
1/4 cup bourbon
1 tablespoon light corn syrup (such as Karo)
10 ounces eggnog-flavored candy melts such as Wilton Eggnog Candy Melts
Ground nutmeg

In a medium bowl, add ground wafer cookies, powdered sugar, pecans and cocoa powder, and stir to combine.

Add the bourbon, eggnog (if desired) and corn syrup, and stir until the mixture comes together and is well-incorporated.

Using a small hinged scoop or a teaspoon, make balls and place on a parchment-lined baking sheet. Repeat with remaining mixture, and place the baking sheet in the freezer for 20 minutes.

Using a double-boiler, add the eggnog candy melts to the top pan and melt slowly. Stir the candy melts just to combine. Drop one chilled bourbon ball in the candy and, using a fork, flip it over to coat. Tap the fork on the side of the double boiler to remove excess candy and place bourbon ball back on the parchment-lined baking sheet.

Sprinkle the wet candy with a tiny pinch of ground nutmeg. Repeat with the remaining bourbon balls.
Refrigerate or eat immediately.


Eggnog Custard Pie
A custard pie is any type of uncooked custard mixture added to an uncooked or partially cooked crust and baked together.  I really like custard pie but I've never made it with egg nog.  I sure hope it tastes as good as it looks!

Pie Crust
1 Egg Beaten

1/2 cup sugar    
2 1/2 cups eggnog
4 eggs                        
Freshly grated nutmeg 

Heat oven to 425°F. Place pie crust in 9-inch pie pan as directed on package for one-crust filled pie. Do not prick crust. Bake at 425°F. for 7 to 9 minutes or until light golden brown. Reduce oven temperature to 350°F.

In large bowl, combine sugar, eggnog and eggs; blend well. Pour into partially baked crust. Sprinkle with nutmeg.

Bake at 350°F. for 30 to 40 minutes or until almost set. (Center of filling will be soft.) Cover edge of crust with strips of foil after 15 to 20 minutes of baking to prevent excessive browning. Cool 2 hours or until completely cooled. Store in refrigerator.


Enjoy Your Holiday!
~Until Next Time
SimplySHAY


Sharon Patrice Simply Perfect Peace Events, Inc. and Designs by Shay, the Blog "My Journey, My Way, My LIFESTYLE ~ Celebrating Love, Laughter and Everything in Between..." You or your brand interested in a review? Getting married or having a social event and need assistance? Email Me For All Your Event Planning Needs.

Saturday, December 6, 2014

Love, Laughter, and EVERYTHING in Between: Day 6 - Crack Pie!!

While searching on Pinterest, I found an interesting recipe for Momofuku's Crack Pie and thought I'd share it with my readers.  Enjoy!

Total time: 1 1/2 hours, plus cooling and chilling times
Servings: Makes 2 pies (6 to 8 servings each)
Note: Adapted from Momofuku. This pie calls for 2 (10-inch) pie tins. You can substitute 9-inch pie tins, but note that the pies will require additional baking time, about 5 minutes, due to the increased thickness of the filling.


First, let’s talk about the crust. It’s starts as a sheetpan-style giant oatmeal cookie slab that’s made from butter, brown and white sugar, an egg yolk, flour, and oats. The big cookie slab is spread about 1/4- inch thick onto a sheetpan, baked for 15 minutes, cooled, and then destroyed by crumbling up with a bit more brown sugar and more butter, and packed into a pie plate as the crust.

Cookie for crust
2/3 cup plus 1 tablespoon (3 ounces) flour
Scant 1/8 teaspoon baking powder
Scant 1/8 teaspoon baking soda
1/4 teaspoon salt
1/2 cup (1 stick) softened butter
1/3 cup (2 1/2 ounces) light brown sugar
3 tablespoons (1 1/4 ounces) sugar
1 egg
Scant 1 cup (3 1/2 ounces) rolled oats
1. Heat the oven to 375 degrees.
2. In a medium bowl, sift together the flour, baking powder, baking soda and salt.
3. In the bowl of a stand mixer using the paddle attachment, or in a large bowl using an electric mixer, beat the butter, brown sugar and sugar until light and fluffy.
4. Whisk the egg into the butter mixture until fully incorporated.
5. With the mixer running, beat in the flour mixture, a little at a time, until fully combined. Stir in the oats until incorporated.
6. Spread the mixture onto a 9-inch-by-13-inch baking sheet and bake until golden brown and set, about 20 minutes. Remove from heat and cool to the touch on a rack. Crumble the cooled cookie to use in the crust.


Crust
Crumbled cookie for crust
1/4 cup (1/2 stick) butter
1 1/2 tablespoons (3/4 ounce) brown sugar
1/8 teaspoon salt
Combine the crumbled cookie, butter, brown sugar and salt in a food processor and pulse until evenly combined and blended (a little of the mixture clumped between your fingers should hold together). Divide the crust between 2 (10-inch) pie tins. Press the crust into each shell to form a thin, even layer along the bottom and sides of the tins. Set the prepared crusts aside while you prepare the filling.


Filling
1 1/2 cups (10 1/2 ounces) sugar
3/4 cup plus a scant 3 tablespoons (7 ounces) light brown sugar
1/4 teaspoon salt
1/3 cup plus 1 teaspoon (3/4 ounce) milk powder
1 cup (2 sticks) butter, melted
3/4 cup plus a scant 2 tablespoons heavy cream
1 teaspoon vanilla extract
8 egg yolks
2 prepared crusts
Powdered sugar, garnish
1. Heat the oven to 350 degrees.


2. In a large bowl, whisk together the sugar, brown sugar, salt and milk powder. Whisk in the melted butter, then whisk in the heavy cream and vanilla.
3. Gently whisk in the egg yolks, being careful not to add too much air.
4. Divide the filling evenly between the 2 prepared pie shells.
5. Bake the pies, one at a time, for 15 minutes, then reduce the heat to 325 degrees and bake until the filling is slightly jiggly and golden brown (similar to a pecan pie), about 10 minutes. Remove the pies and cool on a rack.
6. Refrigerate the cooled pies until well chilled. The pies are meant to be served cold, and the filling will be gooey. Dust with powdered sugar before serving.
Each of 16 servings: 432 calories; 4 grams protein; 45 grams carbohydrates; 1 gram fiber; 27 grams fat; 16 grams saturated fat; 187 mg. cholesterol; 36 grams sugar; 125 mg. sodium.


~Until Next Time
SimplySHAY

Sharon Patrice Simply Perfect Peace Events, Inc. and Designs by Shay, the Blog "My Journey, My Way, My LIFESTYLE ~ Celebrating Love, Laughter and Everything in Between..." You or your brand interested in a review? Getting married or having a social event and need assistance? Email Me For All Your Event Planning Needs.

Friday, November 29, 2013

Fun Friday Find: "Pumpkin Pie Shot!"

I'm not a fan of Pumpkin anything but during this Thanksgiving weekend I had an opportunity to get a little taste of pumpkin pie, without having to actually eat any…I got to drink it!

Considering I'm the family bartender I believe this is an excellent Holiday Shot that can be brought out from now until Christmas…or all winter!

Ingredients:
2 Parts – Pinnacle Pumpkin Pie Vodka
1 Part – RumChata

Add ingredients to cocktail shaker, add ice, shake, and strain into shot glasses…how easy is that!

Enjoy!
Sharon Patrice Simply Perfect Peace Events, Inc. and Designs by Shay, the Blog "My Journey, My Way, My LIFESTYLE ~ Celebrating Love, Laughter and Everything in Between..." You or your brand interested in a review? Getting married or having a social event and need assistance? Email Me For All Your Event Planning Needs.

Friday, October 4, 2013

"Fun Friday Find: Red Velvet Cheesecake"

 
Ingredients
CHEESECAKE:
Two (8-ounce) packages cream cheese, at room temperature
2/3 cup granulated white sugar
pinch of salt
2 large eggs
1/3 cup sour cream
1/3 cup heavy whipping cream
1 teaspoon vanilla extract
RED VELVET CAKE:
2 1/2 cups all purpose flour
1 1/2 cups granulated white sugar
3 tablespoons unsweetened cocoa powder (not Dutch process)
1 1/2 teaspoons baking soda
1 teaspoon salt
2 large eggs, at room temperature
1 1/2 cups vegetable or canola oil
1 cup buttermilk
1/4 cup (two 1-ounce bottles) red food coloring
2 teaspoons vanilla extract
2 teaspoons white vinegar
CREAM CHEESE FROSTING:
2 1/2 cups powdered sugar, sifted lightly to remove any lumps
Two (8-ounce) packages cream cheese, at room temperature
1/2 cup unsalted butter, at room temperature
1 tablespoon vanilla extract
Directions
1. Prepare the cheesecake layer: Preheat oven to 325 degrees F. Place a large roasting pan on the lower third rack of the oven. Place a kettle of water on the stove to boil. Spray a 9-inch spring form pan with nonstick spray and line the bottom with a round of parchment paper. Wrap a double layer of foil around the bottom and up the sides of the pan (you want to seal it so the water from the water bath doesn’t seep into the pan). In a large bowl, use an electric mixer to mix the cream cheese- blend until it is nice and smooth and creamy.


Mix in sugar and salt and blend for 2 minutes, scraping down sides of the bowl as needed. Add eggs, one at a time, blending after each addition. Finally, mix in sour cream, whipping cream and vanilla. Mix until smooth. Pour the batter into the prepared pan. Set the pan into the roasting pan in the pre-heated oven. Carefully pour the hot water from your kettle into the roasting pan (it will fill the pan surrounding the cheesecake). Pour enough water so that there is about an inch of water coming up the foil along the sides of the cheesecake pan. Bake the cheesecake for 45 minutes. It should be set to the touch and not jiggly. Remove the cheesecake from the roasting pan and let it cool on a wire rack for at least an hour. When it has cooled, place the pan into the freezer and let the cheesecake freeze completely. This can be done in several hours- or overnight.
2. Prepare the cake layers: Preheat oven to 350 degrees F. Grease and flour two 9-inch round metal baking pans (or spray with nonstick baking spray with flour). In a large bowl, whisk together flour, sugar, cocoa powder, baking soda and salt. Add eggs, oil, buttermilk, food coloring, vanilla and vinegar to the flour mixture. Using an electric mixer on medium-low speed, beat for 1 minute, until blended. Scrape sides and bottom of bowl with a rubber spatula. Beat on high speed for 2 minutes. Spread the batter evenly into the prepared pans, dividing equally. Bake 30 to 35 minutes or until a toothpick inserted in the center comes out with a few moist crumbs attached. Let cool in pans on a wire rack for 10 minutes. Run a knife around the edge of the pans, then invert cakes onto a rack to cool completely.
3. Prepare the frosting: In a large bowl, using an electric mixer on medium-high speed, beat powdered sugar, cream cheese, butter and vanilla until it is smooth and creamy (do not overbeat).
4. Assemble the cake: Place one cake layer into the center of a cake plate or platter. Remove the cheesecake from the freezer, take off the sides of the pan, and slide a knife under the parchment to remove the cheesecake from the pan. Peel off the parchment. Measure your cheesecake layer against the cake layers. If the cheesecake layer turns out to be a slightly larger round than your cake, move it to a cutting board and gently shave off some of the exterior of the cheesecake to get it to the same size as your cake layers. Place the cheesecake layer on top of the first cake layer. Place the 2nd cake layer on top of the cheesecake.
red_velvet_cake5. Frost the cake: Apply a crumb coat layer to the cake- use a long, thin spatula to cover the cake completely with a thin and even layer of frosting. Be sure to wipe off your spatula each time you are about to dip it back into the bowl to get more frosting (this way you won’t be transferring any red crumbs into the bowl of frosting). Don’t worry at this point about the crumbs being visible in the frosting on the cake. When your cake has a thin layer of frosting all over it, place it into the refrigerator for 30 minutes to “set” the frosting. Once the first layer of frosting is set, apply the 2nd layer. Start by adding a large scoop of frosting onto the top of the cake. Use a long, thin spatula to spread the frosting evenly across the top and then spread it down the sides of the cake too. Because you applied a crumb-coat layer, you shouldn’t have any red crumbs floating around in the final frosting layer.
Decorate, as desired. Keep this cake refrigerated.

Sharon Patrice Simply Perfect Peace Events, Inc. and Designs by Shay, the Blog "My Journey, My Way, My LIFESTYLE ~ Celebrating Love, Laughter and Everything in Between..." You or your brand interested in a review? Getting married or having a social event and need assistance? Email Me For All Your Event Planning Needs.

Friday, September 27, 2013

Fun Friday Find: "Salted Carmel Martini"

We're into Fall; who is ready?  After your first sip of RumChata you'll wonder where it's been all of your life. It's that delicious.  A rum-based cream liqueur made with Wisconsin dairy cream and flavored with cinnamon, vanilla, sugar, and other proprietary natural and artificial flavors. Welcome to the World of RumChata!!


THE SALTED CARAMEL MARTINI
2 parts RumChata
1 part caramel vodka...
sea salt/table salt (do not use margarita salt)

Rim Martini glass with salt (use water, NOT lime juice). Shake ingredients with ice and strain into salted martini glass. 


Optional: Drizzle a teaspoon of caramel sauce into bottom of glass. (carmel is yumLICIOUS so not so optional)

(source:  Rumchata)
Enjoy!


Sharon Patrice Simply Perfect Peace Events, Inc. and Designs by Shay, the Blog "My Journey, My Way, My LIFESTYLE ~ Celebrating Love, Laughter and Everything in Between..." You or your brand interested in a review? Getting married or having a social event and need assistance? Email Me For All Your Event Planning Needs.

Tuesday, September 24, 2013

Tasty Tuesday: (GUEST POST) - Oriental Salad

This is a guest post by my fabulous foodie friend and co-mom Joyce Cunningham of Pthirty1.  A thirty-something, happily married, entrepreneur, blogger , accountant and working mother of 6 beautiful children (ages 10 months to 21 years). Her passions are faith, family, food, fashion, flying and fun – all with a touch of frugality. As a self-certified foodie, she loves to cook, explore new restaurants, cuisines, cooking styles, cookbooks, recipes, etc.  Additionally, an avid DIYer that loves to sew, craft, build, fix and create at home, for the home, family, friends and anything or anyone in need.
 
When trying to figure out different dishes for family fun or upcoming events its easy to draw a blank.  Be sure to try this one, I guarantee you, your family and friends will enjoy it. *Toodles*
 
~
 
I always promote how much of a foodie I am and that I’ll eat just about anything at least once, but I have a secret to tell you. There are certain foods I just absolutely hate…despise even!  Cole slaw is one of them. I don’t know what happened in my childhood that scarred me from eating cole slaw for life, but I simply won’t touch the stuff. I’ve never attempted to make it myself and I always skip it if it’s offered elsewhere.
 
The problem with my distaste for cole slaw is my love for entertaining. I absolutely loooove having folks over and feeding them something so scrumptious they won’t leave without the recipe. Well, naturally, at any summer BBQ, people expect certain staples with their grilled bites. Cole slaw, my friends, is one of them. You see my dilemma?
 
So this recipe came about as an alternative to that wretched, loathsome, cole slaw I refuse to serve at my home. It is made with a vegetable I love – broccoli – and it’s so flexible as a recipe. You can make it savory as is or sweeten it up or even make it “savorier” (yep, I just made that up) ;).

Every time I serve this, I’m always asked for the recipe. My 12 year old loves it so much, she’s learned to make it herself. She loves to take it to school for lunch.  Substituting the sugar with splenda or stevia makes this a healthier choice, but either way , it doesn’t substitute on taste. This slaw is YUMAZING! Enjoy!


You will need:
2 pkgs broccoli slaw
1 pkg broccoli, chopped (or 1 small crown of fresh broccoli)
1 cup roasted sunflower seeds
1 cup sliced almonds (I use Wonderful Almond Accents honey roasted)
½ bunch green onions, chopped
2 pkgs Ramen noodles, uncooked

Optional add-ins
1 cup bacon bits
1 cup dried cranberries

For vinaigrette:
¾ cup oil (I use canola)
½ cup sugar (or sugar substitute)
2 flavor packets from Ramen noodles

Directions:
1.       In a large bowl, mix slaw, broccoli, nuts, and onions. If using, mix in add-ins.
2.       Crush noodles over slaw and mix well.
3.       In a small bowl, mix vinaigrette ingredients well.
4.       About 1 hour before serving, pour vinaigrette over slaw and mix well (I mix this with my hands).
5.       Cover and chill until ready to serve.
6.       Enjoy! ;)

Sharon Patrice Simply Perfect Peace Events, Inc. and Designs by Shay, the Blog "My Journey, My Way, My LIFESTYLE ~ Celebrating Love, Laughter and Everything in Between..." You or your brand interested in a review? Getting married or having a social event and need assistance? Email Me For All Your Event Planning Needs.

Tuesday, August 13, 2013

Tasty Tuesday: "Spicy Chicken Dip"


This past weekend the Patrice' had the honor of hosting the trunk party for my niece Sydni.  Our home was transformed into a place where family and friends could come and celebrate the end of one journey and the start of a new one for a beautiful young lady headed to Indiana State.

What is a celebration without food?  As with any other event my family and friends are involved in; an array of foods were available but one in particular really pleased my palette.


Ingredients
- 1 bag of diced chicken breasts
- 1/3 cup of Toms hot sauce
- 8oz pkg of cream cheese
- 1/2 cup of ranch dressing
- 1 cup of shredded cheddar cheese

Directions
Heat oven to 350.  In a separate pan, combine diced chicken and hot sauce cooking over medium heat until tender and evenly covered.  Now add cream cheese and ranch dressing (stirring often) until melted.

Convert all of the above into a serving dish, sprinkle with shredded cheese and bake for 20 minutes.  Serve with chips, bread or vegetables.  Enjoy!

"Live & Love"
Sharon Patrice Simply Perfect Peace Events, Inc. and Designs by Shay, the Blog "My Journey, My Way, My LIFESTYLE ~ Celebrating Love, Laughter and Everything in Between..." You or your brand interested in a review? Getting married or having a social event and need assistance? Email Me For All Your Event Planning Needs.

Friday, August 2, 2013

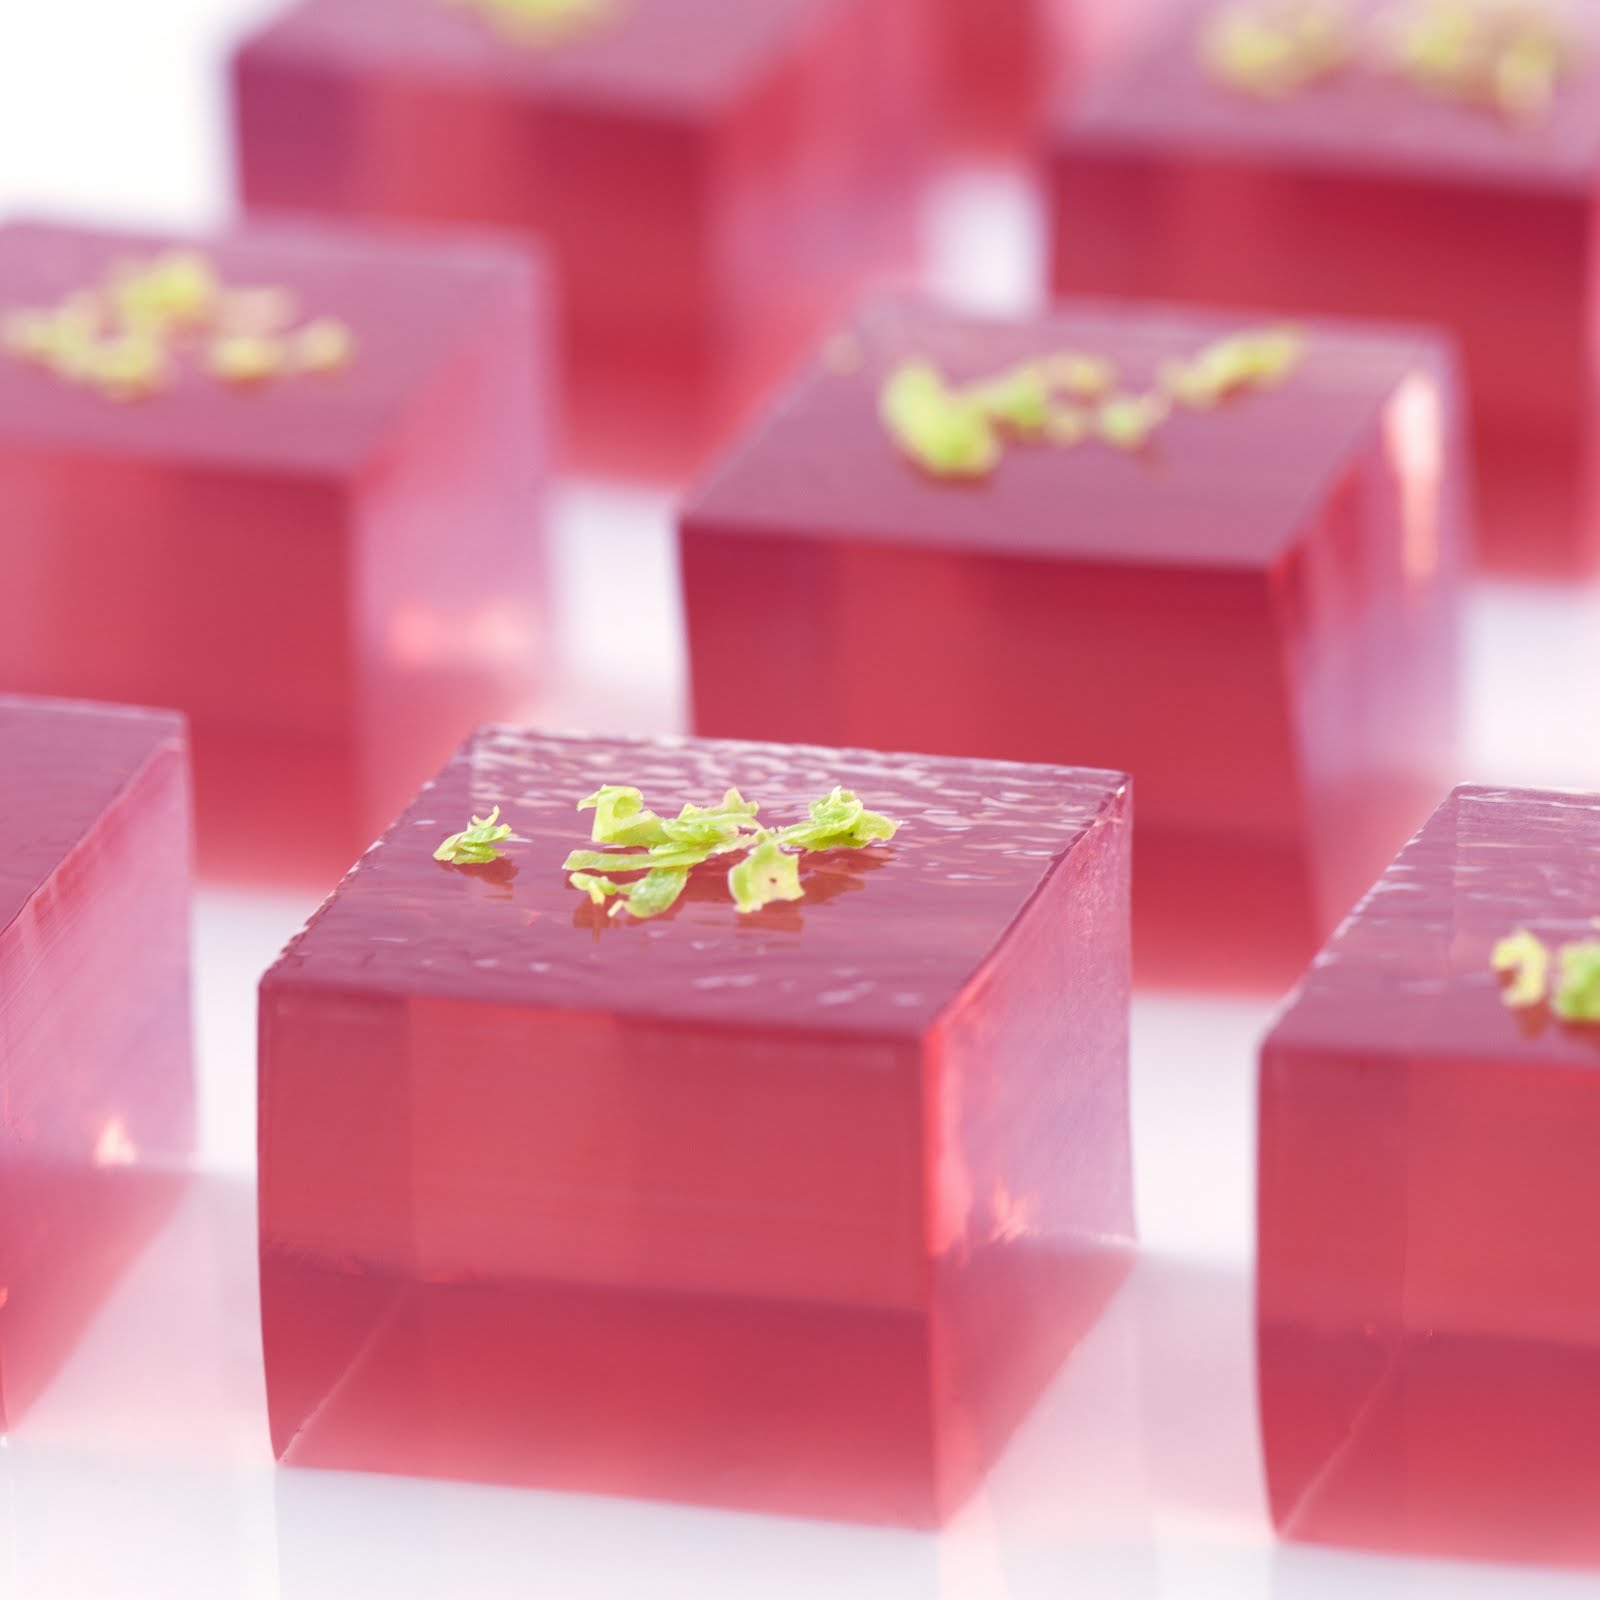
Fun Friday Find: Re-Introducing JELLY SHOTS!!


Many of my readers are familiar with serving alcohol during their events.  However, if you're looking for a fresh and chic method to serve alcohol at your wedding reception or event, then allow me to re-introduce you to the wonderful world of Jelly Shots.

A classic cocktail translated in gelatin form, Jelly Shots are a grown-up version of the Jell-O Shot (sans Dixie cups, of course!). The basics of a Jelly Shot include: a flavor true to the cocktail inspiration and a free-spirited jiggly form that makes them a delight to your taste buds. Below are a few examples from the pros over at the Jelly Shot Test Kitchen.

The Bramble (Lemon, gin, flavored gelatin, blackberry liqueur)

 Cosmopolitan (Cranberry juice, Orange flavored vodka, Grand Marnier or Cointreau, Roses Lime) 
Ocean Margarita (Agave tequila, Blue Curacao, Roses Lime)


 Rainbow Jelly Shooters (flavored gelatin dessert, rum or vodka)

Cosmopolitan, Blackberry (Vodka, white cranberry juice, blackberry brandy, lime, Cointreau)


 " Live & Love'
Sharon Patrice Simply Perfect Peace Events, Inc. and Designs by Shay, the Blog "My Journey, My Way, My LIFESTYLE ~ Celebrating Love, Laughter and Everything in Between..." You or your brand interested in a review? Getting married or having a social event and need assistance? Email Me For All Your Event Planning Needs.

Tuesday, July 30, 2013

Tasty Tuesday: "Not Your Regular Chicken Parm"

I am one busy mompreneur!!! I work a full time job, plan weddings/events, design stationery, drive a cab.. I mean transport children AND find time for a husband.  Needless to say some days the meal choices aren't that great, the cab needs gas and the hubby... well, he's understanding MOST days.  However, every once in a while I figure out a way to do something pretty darn cool. 

On Saturday I did some grocery shopping and due to getting some bad news that knocked me off my square, I completely forgot to freeze the chicken breasts in addition to some other things.  Well, it's Sunday! I've attended two church services, had a bridal meeting, steamed the floors (again), started a load of laundry, cut paper for invitations, and no matter how I try to avoid it - I must cook - cook what?  THE CHICKEN!


When I looked at the chicken I had every intention to simply grill or fry it and keep it moving.  Then I had a great idea of making chicken parm.  Half way through prep I realized I didn't have enough sauce, nor did I have enough tomatoes to make it from scratch.  What's a girl to do?  IMPROVISE!!! 

When  your 14 year old says you rocked, you ROCKED!!!  Here is my version of Chicken Parm and Garlic Mostacholi with bacon and mushrooms.


Ingredients
-Chicken Breasts
-Italian Bread Crumbs
-Seasoning Salt
-Pepper
-Olive Oil
-Prego Garlic Sauce
-Stewed Tomatoes
-An Array of shredded cheeses
-Mostacholi
-Bacon
-Spinach
-Mushrooms
-Garlic
-Butter

Directions
Pre-heat over to 350.  Season thawed chicken breasts and cover with bread crumbs.  Lightly brown over medium heat in olive oil.  Place browned chicken breasts into a foil pan and cover with Prego and stewed tomatoes.  Be sure to leave a few tomatoes for the mushrooms.  Cover and bake for 45 minutes, add an array of shredded cheeses and re-cover.

In a separate pan, add 2 pats of butter, seasoning salt, pepper, garlic and mushrooms.  Sautee until almost done and add a few stewed tomatoes.

In a pot, boil your mostacholi until done.  Once done, add a stick of butter, the mushroom mixture and any left over cheese.  Serve hot!!

"Live & Love"
Sharon Patrice Simply Perfect Peace Events, Inc. and Designs by Shay, the Blog "My Journey, My Way, My LIFESTYLE ~ Celebrating Love, Laughter and Everything in Between..." You or your brand interested in a review? Getting married or having a social event and need assistance? Email Me For All Your Event Planning Needs.

Tuesday, May 28, 2013

Tasty Tuesday: "Crockpot BBQ Chicken Breasts"

The holiday is suppose to be a time of rest and relaxation in my book.  Therefore, to ease the pressure of grilling everything I tried this recipe for the family.  Not sure how well it went over but as with all recipes, this too is good for a small or medium size event.

Ingredients
4-6 Chicken Breasts
1 bottle BBQ Sauce
1/4 cup vinegar
some minced garlic
1/4 cup brown sugar
some red pepper

Directions
In a medium sized bowl mix the BBQ Sauce, vinegar, garlic, brown sugar and red pepper stirring until mixed well.  Take the chicken breasts and put into the crock pot and pour the sauce over it.  Cook for 4-6 hours. DONE!

This was really good with corn on the cob and some other sides as well as on a hamburger bun for a snack.

Sharon Patrice Simply Perfect Peace Events, Inc. and Designs by Shay, the Blog "My Journey, My Way, My LIFESTYLE ~ Celebrating Love, Laughter and Everything in Between..." You or your brand interested in a review? Getting married or having a social event and need assistance? Email Me For All Your Event Planning Needs.

Tuesday, May 21, 2013

Tasty Tuesday Recipe: Teriyaki Salmon Salad


Week five of the weight loss challenge with ChiTown Moms has been in a word CHALLENGING.  True enough I've worked out but clearly lifting cake to my mouth hasn't been as successful as I'd hoped for. 

Even with my busy schedule I try and make at least one really healthy dish for the family.  As with anything I do, I see it as an "event" and making this simple dish was no different.  Baked or Grilled Teriyaki Salmon Salad with walnuts and craisins satisfied my appetite and didn't send my jeans screaming at the thought of having to be worn.

Ingredients
Salmon
Teriyaki Marinade
Lettuce
Spinach
Glazed Walnuts
Carrots
Cucumbers
Tomatoes
Craisins
.....and anything else you like in salad

Directions
Marinade the Salmon with the teriyaki sauce and wrap in foil prior to baking or grilling. 
Prepare Salad with fixings, bake or grill the fish and add on top.  I used Raspberry Vinaigrette salad dressing for myself and it was so yummy!

Enjoy!
Sharon Patrice Simply Perfect Peace Events, Inc. and Designs by Shay, the Blog "My Journey, My Way, My LIFESTYLE ~ Celebrating Love, Laughter and Everything in Between..." You or your brand interested in a review? Getting married or having a social event and need assistance? Email Me For All Your Event Planning Needs.

Tuesday, May 14, 2013

Tasty Tuesday: Shay's Peach Cobbler!!!

If you're hosting an event of any kind the question arises about what sweet treat you can serve.  Are you tired of cupcakes and the like? Me too!  Well, last week at work a few people were having this very discussion as it related to graduation parties and an upcoming bridal shower. I absolutely LOVE planning but talking about desserts and creative ways to serve them is right up my alley. 

In terms of desserts, one of my all time favorites would have to be peach cobbler.  This warm delectable treat is easy, quick and absolutely yumtastic! If you're having a small and intimate function, consider using individual ceramic baking dishes for an additional touch of glam.


SHAY'S PEACH COBBLER- Hope it makes your tummy as happy as it does mine and those I love....


Ingredients
2 large cans of sliced peaches
1/2 stick of butter
some cinnamon (I don't measure)
1/2 cup of sugar
1/4 cut Malibu Coconut Rum
1/4 Triple Sec
some flour to thicken the juice
Pie Crust

Directions
Boil Peaches until you think they are almost done. Add 1/2 stick of butter, cinnamon, sugar, Malibu and Triple Sec and continue boiling.  Add pinches of flour to thicken the mixture BUT not too much because it's not a paste


In a separate dish, line the bottom with the pie crusts and bake for approximately 10 minutes.  Pour in the warm mixture and CRUMBLE lots of  pie crusts on top.  Sprinkle with sugar and bake until golden brown.  

Serve warm ... "Toodles"

Sharon Patrice Simply Perfect Peace Events, Inc. and Designs by Shay, the Blog "My Journey, My Way, My LIFESTYLE ~ Celebrating Love, Laughter and Everything in Between..." You or your brand interested in a review? Getting married or having a social event and need assistance? Email Me For All Your Event Planning Needs.

Tuesday, May 7, 2013

Tasty Tuesday Recipe: Spicy Stuffed Chicken Breasts

Welcome to Tasty Tuesday!! What does this have to do with event planning or weddings? Nothing and everything. Life in itself is an event and daily we find ourselves celebrating in some time of way. Currently, I am doing a weight loss challenge with a group of ChiTown Moms called "Lose Weight in 8".  So, in honor of that challenge and Mother's Day, I thought it would be interesting to post recipes each Tuesday during the month of May.

My alias during the challenge is "The Busy Absentee"!  As a professional wedding and events planner I am typically always busy AND always absent from healthy food choices.   I get so busy planning and managing business and family that I often forget to eat.

Last week I believe I did OK by preparing the following recipe for the family... Try it for yours and even for Mother's Day!!! 


Spinach and Pepper Jack Stuffed Chicken Breasts with Sauteed Mushrooms. 
Ingredients
8 Chicken Breasts
2 Pkg Spinach (I used frozen creamed)
16oz Pepper Jack Cheese
Mushrooms
Cajun Spices
Grape seed Oil
Toothpicks

Directions
Heat oven to 350. In a bowl mix the spinach and cheese until well blended.

Take the chicken breasts and split open and stuff with spinach mixture. Using the toothpicks to keep close, turn over and rub with grape seed oil and sprinkle with Cajun spices.  Place in glass baking dish and put into the oven and bake for 45-50 minutes.  In a separate pan, cook mushrooms.  Once sauteed and place over chicken with remaining spinach/cheese mixture
Sharon Patrice Simply Perfect Peace Events, Inc. and Designs by Shay, the Blog "My Journey, My Way, My LIFESTYLE ~ Celebrating Love, Laughter and Everything in Between..." You or your brand interested in a review? Getting married or having a social event and need assistance? Email Me For All Your Event Planning Needs.

Saturday, February 16, 2013

Soothing Saturday with Shay: Shrimp and Four Cheese Ravioli with Vodka Sauce

Soothing Saturday's with Shay are often planned events where I allow others into my journey, my way, and my lifestyle.  However, that isn't all it consists of!  As a wife, mother and entrepreneur, I am very busy so personal Soothing Saturday's with Shay are very important to me.  There aren't many weekends that I get to be at home with the family so it's imperative that I make good use of the time. 

Today, after making smoothies for breakfast, watching the nephew and Dayton on ESPN2 and making everyone clean up, I thought I'd try my hand at a new dish. 


Shrimp and Four Cheese Ravioli with Vodka Sauce was a fabulous choice for the family on this Saturday.  Being the daughter of Dorothy and the granddaughter of Jennie; I'm not one for measuring but here are the ingredients and how I created this Soothing Saturday with Shay dish.

Disclaimer:  I'm just a woman with a family so use your imagination on the parts you think I left out :)

Ingredients
Jumbo Shrimp (approx 50)
Mushrooms
Tomato and Basil Sauce
Vodka
Buitoni Ravioli
Minced Garlic
Lemon Pepper
Butter
Olive Oil
Cream Cheese
Pepper Jack, Mozzarella & Parmesan Cheese


Once everything was sliced and peeled it was time to get this baby on the stove.  I must warn you that it took all four burners and several dirty dishes to complete, but it was well worth it in the end.

Directions
Prepare the shrimp and season with lemon pepper. Set aside

In a separate pot add water and salt for the ravioli.

In a medium sized pot mix the sauce and 1 cut of vodka.  Cook on low heat for approximately 20 minutes.


In yet another pan, add butter and olive oil.  Saute the mushrooms and then add shrimp.  Once the shrimp are pink add garlic and whisk in cream cheese until smooth.  Add the tomato sauce mixture and the other cheeses.


 Boil the ravioli for 8 minutes, rinse and add the above sauce.... bon appetite!

"Live Life With No Regrets"
Sharon Patrice Simply Perfect Peace Events, Inc. and Designs by Shay, the Blog "My Journey, My Way, My LIFESTYLE ~ Celebrating Love, Laughter and Everything in Between..." You or your brand interested in a review? Getting married or having a social event and need assistance? Email Me For All Your Event Planning Needs.

LinkWithin

Related Posts with Thumbnails